Seed Starting- Part 1
Starting seeds can be intimidating if you have never done it. It's very easy to end up with long, leggy plants that struggle when moved outside. Let's review the basics of seed starting so you have some tips to help get started this spring.
Timing is one key to being successful when starting seeds for your garden. Most of our vegetable varieties will need to be started in six to eight weeks, and flowers up to twelve weeks before you plan to set your plants outside in the garden. Most of our plants will need to be held inside till after the threat of frost is over; I usually recommend planting around the end of April or the first part of May since our average last frost is in mid-April. This gives the ground some extra time to warm up and reduces the chances a late frost will have us scrambling to cover our plants. If we follow the recommended start times, we will plant vegetable seeds from the first weekend to mid-March, and flowers should start the first weekend of February. There are a couple of exceptions to the above starting dates; our broccoli, cabbage, etc., can be planted before the frost-free date or the end of March to early April, so those will be planted on the first weekend of February. Our vining crops should be started a few weeks later to avoid getting too big. Be sure to check the packaging of the seeds you are beginning to verify how long is recommended for that particular variety.
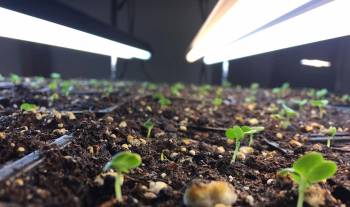
Once you have figured out when to start your seeds, the next big issue to address when starting seeds is lighting. Seedlings need at least 12 hours of light to prevent long leggy growth. Unfortunately, we can’t get that using sunlight alone in a window so that some supplemental light will be necessary. Luckily, seedlings do not require high-quality, expensive light sources to grow successfully. Seedlings need a high quantity of light, but it doesn’t have to be high quality. I have found that using fluorescent light fixtures with one warm or daylight bulb and one cool light provides the correct light spectrum that seedlings need to thrive. The bulbs need to be positioned four to six inches above the tops of the seedlings to give enough light to prevent stretching. As the seedlings grow, move the lights up higher. I usually use a timer set to have the lights on for 14 hours to make it easier to manage the light system.
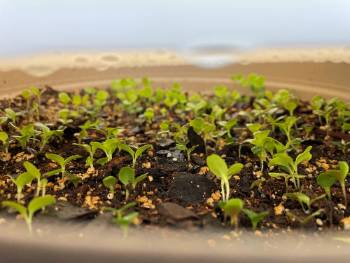
Once you have figured out when to start the seeds and have the lights ready, the next step is to grow the seedlings. Any container can be used, from garden trays to plastic cups, recycled plastic containers to paper pots, as long as it has good drainage so the plants don’t drown. Use a high-quality seed starting mix or peat pellet to start your seeds. Don’t use soil from the garden to start seeds, as there can be weed seeds, diseases, or insects in the soil that could damage or kill your seedlings. I usually use the peat pellets to start my seeds, but that is what I’ve had the best luck with based on my watering schedule and the varieties I’m starting. Try a couple of different options to see what works best for you.
Once you have planted your seeds, use a plastic dome or bag to ensure the seed mix doesn’t dry out while the seeds are sprouting. A heat mat under the seed mix can also help speed germination by keeping the soil warm. Using bottom heat can also help encourage uniform germination so the seedlings are all about the same age for care and transplanting.