No-Till Gardening

Many farmers in our area utilize no-till farming with their crops, but No-Till Gardening hasn’t gained popularity until recently. One reason it is gaining popularity is to protect the soil structure, which, even in a garden, is negatively impacted by tillage. This structure and root growth are essential to water and air movement in your garden. Another reason no-till gardens are becoming more popular is that they tend to be less maintenance and require less equipment. Let’s talk about starting because the fall is the optimal time to try something new.
Starting a no-till garden is similar to starting any new garden plot. Select a garden site with plenty of sunlight and is not in a low spot where water might pool and stand. You should also ensure easy access to water and that the location is not too far from your house. If the site is in your yard or weeds grow, you will have to kill the current vegetation through a couple of options. One option is to use a herbicide to spray the area to kill the weeds. It’s best to water the area well several days before you spray to ensure you kill the weed rather than burn the foliage. A second option is to cover the location with plastic or cardboard to kill the plants underneath. These options can work, especially in the late summer to fall when we still have warm days. If you already have a garden spot, you should wait till the garden is finished for the year before you start.
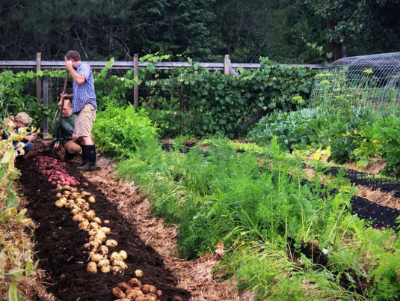
Once you have your spot prepared, it’s time to develop that layer of mulch that will help improve the soil and keep the weeds down. The first step is to cover the ground with a layer of cardboard or newspaper to help suppress weeds that might try to sprout. Then, cover that area with a layer of mulch or compost 6-10” thick. This is the key to keeping the weeds down. This layer can be composed of anything, but the picture to the left shows how you could layer your mulch layer. Plan your beds in the spring before you plant so they are 3-4’ wide. Keep your beds narrow so you can weed, plant, and harvest without walking in the area, and have designated walkways so you don’t have to walk in your planting areas to prevent soil compaction over time. When you go to plant, scrape the mulch away and go down to the ground. Plant your seeds or plant, then push the mulch back once the seeds have sprouted. Try to maintain at least a 6” layer of mulch on top of the soil at all times, so it will need to be replenished annually to some degree. That’s why fall is a great time to start with all the leaves that will soon be falling.

Have questions? Contact our office where our Horticulture Extension Agent will assist you with questions.
Phone: (316) 321-9660
Email: callae@ksu.edu