Container Vegetable Gardening
Growing vegetables in containers is a rapidly expanding trend here in the US, and vegetable hybridizers have taken notice. There are currently varieties of every type of vegetable available that were created for growing in containers, making it easier than ever to try.
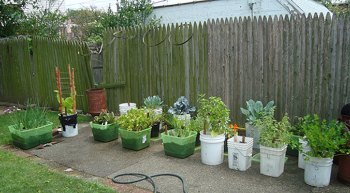
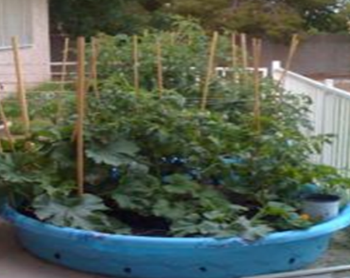
The first, and in some ways the most crucial part, of container gardening is the container itself. Containers can be made from various materials, including clay, plastic, cloth, wood, concrete blocks, or even wire baskets with sphagnum moss, as long as the container has never contained toxic chemicals. Some of the cheapest container options can be storage totes, five-gallon buckets, protein tubs from livestock, or even old swimming pools your kids have outgrown. The key is they need to be at least 6 inches deep and have drainage holes, which you can easily add yourself. Avoid dark-colored pots because they tend to heat up faster, and the heat can damage the roots of your plants. Large vegetables such as tomatoes, squash, watermelon, and corn will need containers that are a minimum size of a five-gallon bucket. The bigger the container, the more room for roots; the cooler the roots will stay with more soil to buffer the temperatures. If you are worried about your plants drying out during the hot summer days, self-watering containers can be purchased or similar to the one in the picture below; they are easy to make.
Once you have a container, the next step is figuring out where to put it. Fruiting vegetables need eight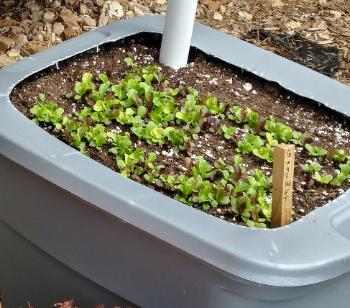 or more hours of sunlight a day, while root and leaf crops need approximately 6 hours minimum of sun. Figure out where you want to put your container to receive the maximum amount of light possible. You should figure out where you put your containers before filling them because they get very heavy once filled up. A word of caution: water from the containers can stain decks. To prevent staining, you can use saucers to catch excess water (which can help avoid angering your neighbors if you live in an apartment), but they need to be emptied after rain or watering so the plants don’t stand in water.
Once you have a container and know where you will put it, the next step is to fill it up with media of some kind. Whatever media or mix you use should provide nutrients for the plant, hold moisture, allow for maximum root growth, and support the plant so it doesn’t fall over. I will never recommend using just straight garden dirt or topsoil in containers. It turns into a rock as it dries out and becomes compacted, so the roots can’t grow through it. You can use topsoil that has been pasteurized as part of a mix, but it should never be more than 10% of the mix and only used in big pots or raised beds. A peat or coco coir-based potting mix is your best option for containers in combination with compost. This combination is lighter but will hold adequate water for growing vegetables. You can reuse your soil for several years if you have no disease issues. I would refresh the soil every couple of years by adding in new compost or potting soils to replace the nutrients used by the plants every year.
The final step is determining what vegetables I can plant in a container. You can grow any vegetable in a container you would grow in the ground. When looking at varieties, find ones that are labeled “dwarf” or “bush” varieties. A wide array of varieties have been developed strictly for containers and are usually labeled as such. Tomatoes, peas, and vining crops will need some support to grow. A tomato cage or trellis can help keep them contained and prevent them from sprawling everywhere on your deck. Click here for a list of recommended varieties for containers.
 As with all container plants, your vegetables must be watered regularly, especially when it gets hot in the summer. One way to reduce the amount of water is to put a mulch layer down over the top of your soil to reduce evaporation and help keep the soil cooler. Fertilizer will also be necessary to keep the plants producing all summer long. I typically mix a slow-release vegetable fertilizer when I put my soil in the containers. This way, my vegetables get some fertilizer every time I water. I’ll fertilize every couple of weeks with a water-soluble general fertilizer (10-10-10 or 14-14-14) once the plants start to set blooms and produce fruit. I tend to wait to fertilize my tomatoes until they set blooms because I want them to produce tomatoes, not just grow impressive tops, which I have had happen. I try to “flush” the soil periodically by watering it thoroughly till the excess water runs out to prevent the buildup of salts from the fertilizer in the soil. Monitor your plants for disease, insect, and nutrient issues. These can usually be corrected, but they are easier to fix if you catch them early.